Uniview U-Code Bitrate Compression Eases Network Requirements and Eliminates Storage Issues
Uniview U-Code: How to save Bandwidth and Hard Drive Space.
Uniview has developed their own Smart Codec that they have intergraded with 4MP+ cameras and 3XX network video recorders. Don’t worry if a previously ordered device does not have the U-Code feature it can be added with just a firmware update!
Enabling U-Code is quick and easy.
U-Code Basic supports 3rd party
manufactures and saves up to 75% of bandwidth and HDD storage.
U-Code Advanced
is for UNV cameras and Recorders to sync together saving up to 90% of bandwidth
and HDD storage.
Enabling U-Code on a UNV Camera
- Log into the Uniview camera directly with Internet Explorer.
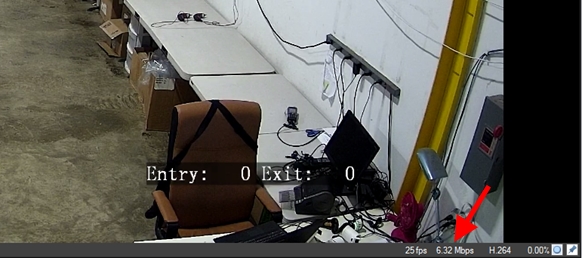
- Check to see how much bandwidth the camera is
using in the live view by hovering the mouse over the live image and checking
the streaming bit rate in the bottom of the overlay. In the demo image below we
are using a little over 6 Mbps.
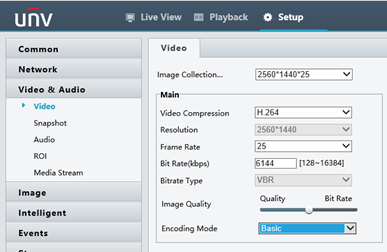
- ext navigate to Setup at the top of the screen then to Video & Audio on the left hand menu.
- In the Video Encoding menu, find the Encoding Mode Setting.
- For UNV cameras the only option currently is the
BASIC Encoding Mode. Set Basic as the Encoding Mode and then click Save at the
bottom of the screen.
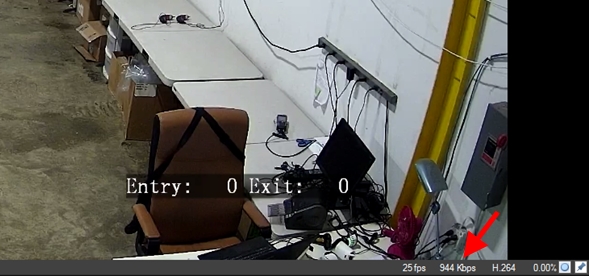
- .Last after saving the Encoding Mode, navigate
back to Live View and check the new streaming bit rate, there should be a large
noticeable difference in bit rate streaming, but the video quality should be
exactly the same. In the example below after turning on U-Code the camera is now
streaming at about 950 Kbps! That is a 85% reduction in bandwidth!
Enabling U-Code on a UNV NVR
There are two different ways to set up U-Code on a UNV NVR. The first way is
from the recorders direct monitor and the second way is from the web gui.
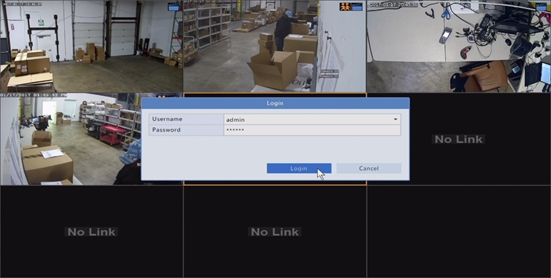
Enabling U-Code from the NVR Monitor
- Right click and log into the main menu of the
recorder. The Default login for the recorder is username admin and password
123456

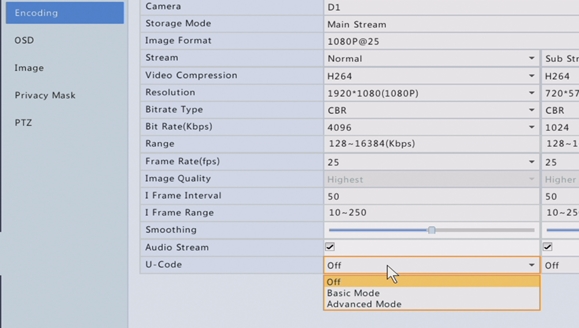
- Once in the main menu navigate to the Camera menu and then to the Encoding Menu.
- The U-Code setting can then be set to two different
settings. Basic mode is for 3
rd party manufactures. Advanced mode is
for UNV Cameras. Select the setting that will best fit the camera that will be
used on this channel. Remember that the U-Code setting in the recorder will
need to be set up for each channel.
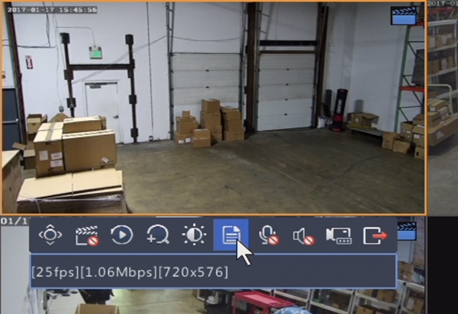
- On the live view for the recorder the bit rate
that the camera is being streamed at can be checked from the quick channel menu
by highlighting over info button.
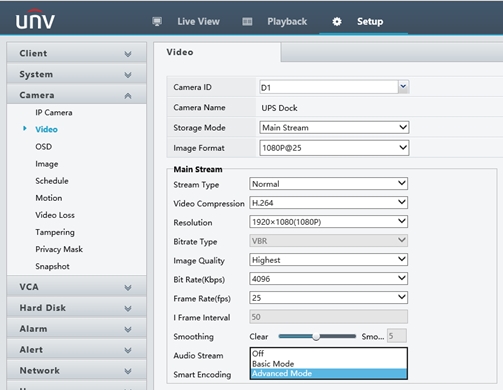
Enabling U-Code from the NVR Web GUI.
- Load the recorders local IP address in the internet explorer browser. Once at the login screen login to the recorder, default login is username admin and password 12345
- Once logged in navigate to the setup menu at the top of the screen. Note this may be behind the change password box make sure this is closed first.
- Next navigate to the Camera menu on the left hand menu, and then into the Video sub-menu.
- In the Video menu set the Smart Encoding Mode to
the correct setting based off of the type of camera the channel is using.
Remember if it is a 3
rd party manufactures camera use Basic Mode and
if it is a UNV camera use Advanced Mode. Also remember that U-Code has to be
enabled for each channel in the recorder.